
- September 14, 2026
- Posted by: Fiza Batool
- Category: Uncategorized
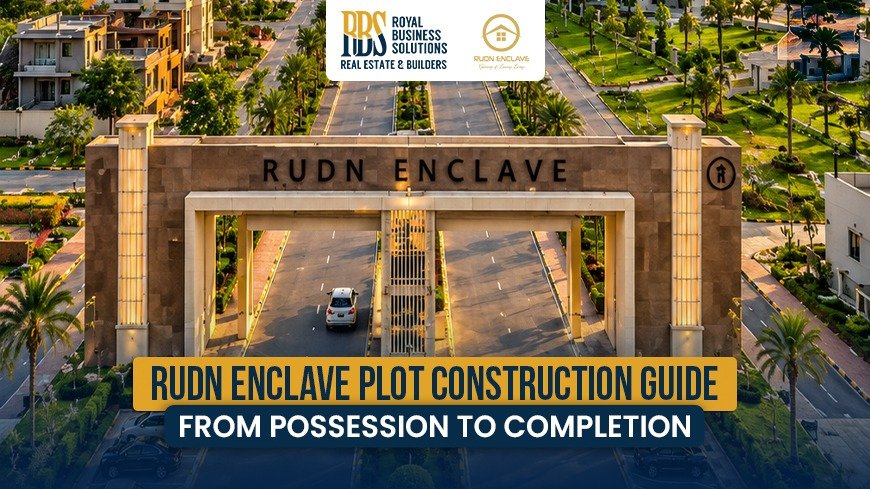
With possession in key areas like Executive Block and easy transportation via the Adiala Interchange on the Rawalpindi Ring Road, RUDN Enclave is no longer just an investment; it’s now a place where houses are being built. Roads, underground electricity, and other basic amenities are ready, and people are rapidly building their homes in Executive, General, H-Block, and Overseas Blocks.
The construction process for RUDN Enclave can feel complicated if you’ve never built a house before. Many people get confused about paying the file dues, obtaining NODC (No Demand Certificate), hiring RDA-approved engineers, and understanding the rules of the society.
This RUDN Enclave plot construction guide explains every step from getting possession to getting the Completion Certificate. For your convenience, the entire RUDN Enclave construction process has been divided into six steps so you can organize your budget, time, and construction team without any confusion.
Phase 1: Pre-Construction & Documentation (Weeks 1-4)
Before starting the construction work, it is mandatory to obtain all legal and administrative approvals from the society administration (RMRSCO), as ignoring this process often leads to work delays.
Step 1: Clear Your File & Get Your NDC
First, pay the total price of your plot, installments, and development charges in full. After that, go to the head office of RUDN Enclave (Wilayat Complex, Bahria Town Phase 7, Rawalpindi) with all the receipts and obtain your No Demand Certificate (NDC). Also, verify that the underground utilities in your street and block are complete and that the block has been declared Position Ready.
Step 2: Request for Possession and Demarcation
After receiving the NDC, submit a formal application for possession along with your allotment letter and a copy of your identity card. Once the application is approved, the society’s survey team will visit your plot, identify (mark/demarcate) all four corners, and issue a Demarcation Certificate. Deposit the prescribed fee for this stage in the society’s official bank account and keep all receipts with you.
Step 3: Know the Building Bye-Laws Before You Design Anything
RUDN Enclave’s master plan was developed with NESPAK and follows PHATA and RDA regulations, so these aren’t optional requirements; they’re the RUDN Enclave construction guide you’ll be held to during final inspection.
- For 5 & 7 Marla plots, there is a minimum 5-foot front setback, with mandatory rear open space.
- For 10 Marla & 1 Kanal plots, there is a minimum 10-foot front setback, 5-foot side yards, and rear open space.
- Height limits are typically Ground + 1 Floor + Mumty, or Ground + 2 Floors where specifically approved.
- Basements are allowed on most plot categories, subject to structural engineering sign-off and soil stability checks.
Phase 2: Design & Map Approval (Weeks 5-8)
Once your plot has been demarcated, it’s time to bring in professionals and get your design formally approved, a key part of RUDN Enclave plot development.
Step 4: Hire Registered Professionals & Test the Soil
Make sure to work only with an architect and structural engineer registered with RDA/PHATA, ideally with prior experience in societies along the Adiala Road corridor. A geotechnical soil test is essential at this stage too, since it determines whether your house will need strip footings, a raft foundation, or reinforced columns.
Step 5: Prepare Your Drawings
Your architectural team should put together a complete drawing package, including:
- Architectural floor plans, elevations, and cross-sections for each floor.
- Structural drawings covering columns, beams, slabs, and foundations.
- Services drawings for sewerage, drainage, water supply, and electrical routing.
- Water tank designs for both underground and overhead storage.
Step 6: Submit for Vetting & Get Your Construction Permit
Submit all your prepared documents to the Design Vetting Committee of RUDN Enclave. For this, you will need a copy of your ID card, original position certificate or allotment letter, four sets of signed drawings, structural stability certificate, and soil test report.
It usually takes 2 to 3 weeks for the committee to review it. After approval, you will be issued the society’s official Site Construction Permit and approved drawings, which is a very important step in any RUDN Enclave house construction plan.
Phase 3: Site Preparation & Utilities (Weeks 9-10)
With your permit approved, the next stage of construction of plots on RUDN Enclave is getting the site physically ready.
Step 7: Set Up Temporary Utilities
Apply for a temporary construction water connection through the society, and arrange either a temporary electricity connection or a generator/solar setup to run your mixers and vibrators. Build a lockable storage shed for cement, steel, and fittings, and appoint a site supervisor to keep an eye on deliveries and security.
Step 8: Level, Excavate & Treat the Soil
Clear debris and topsoil, level the plot to the road reference level, and mark your layout with chalk lines and pegs based on the approved drawings. Excavate down to load-bearing soil as indicated in your soil report, and apply anti-termite treatment before any concrete goes in.
Phase 4: Grey Structure Construction (Months 3-7)
This is the core of the RUDN Enclave building process, the skeleton that everything else depends on.
Step 9: Foundation Work (Weeks 11-14)
First, lay the PCC layer in the foundation trenches, then fill RCC concrete for columns and foundation with steel reinforcement. Then fill the plinth beam and make sure to apply a Damp Proof Course (DPC) and bitumen (lacquer) coating on top of the timber to prevent future leaks.
Step 10: Brickwork and Foundation (Month 4 to 5)
Choose external and internal walls, construct columns and beams, and fill the roof of each floor. Regular watering (giving water) for at least 14 days is essential to strengthen the roof and brickwork.
Step 11: Pipelines, Frames and Plastering (Months 6 to 7)
Cut the walls for electrical and sanitary pipes, fit the door and window frames, and apply a good two-coat plastering to prepare the space for tiling and painting.
Phase 5: Finishing & Fit-Outs (Months 8-12)
This is where your RUDN Enclave plot construction finally starts to look like a home.
Step 12: Waterproofing, Flooring & Woodwork
Apply chemical waterproofing to bathrooms, roofs, and water tanks before laying tiles. Add false ceilings, doors, wardrobes, and kitchen cabinetry.
Step 13: Paint & Fixtures
Use weather-resistant exterior paint suited to Rawalpindi’s climate, apply interior finishes, and install lighting, plumbing fixtures, and sanitaryware.
Phase 6: Final Inspection & Completion Certificate (Month 12+)
The last stage of any RUDN Enclave development project is society sign-off.
Step 14: Final Technical Inspection
Society inspectors check that setbacks were respected, your sewerage is properly connected, and your building height matches the approved plan.
Submit your completion request with final photos. Once approved, RMRSCO issues your Building Completion Certificate, letting you convert your utilities to permanent connections, apply for gas, and finally move in.
Estimated Construction Costs (2026)
| Plot Size | Covered Area | Grey Structure Cost | Finishing Cost | Total Estimate |
| 5 Marla | 1,600-1,900 sq ft | PKR 3.5M-4.2M | PKR 3.0M-3.8M | PKR 6.5M-8.0M |
| 7 Marla | 2,200- 2,500 sq ft | PKR 4.8M-5.8M | PKR 4.0M-5.0M | PKR 8.8M-10.8M |
| 10 Marla | 3,100- 3,500 sq ft | PKR 7.0M-8.2M | PKR 5.8M-7.0M | PKR 12.8M-15.2M |
| 1 Kanal | 5,200-6,000 sq ft | PKR 13.5M-16.0M | PKR 11.0M-13.5M | PKR 24.5M-29.5M |
Common Mistakes to Avoid
The following are the common mistakes you should avoid while following the RUDN Enclave plot construction guide:
- Rawalpindi’s terrain varies significantly, and building without a soil report risks settlement and cracking later.
- Modifying load-bearing walls or building into setback zones can lead to fines or forced demolition.
- Inadequate water curing can weaken concrete strength by up to 40%.
- Skipping damp-proofing can cause moisture problems, especially during Pothohar’s monsoon season. Proper DPC and waterproofing are essential to protect the building.
Frequently Asked Questions(FAQs)
Q1: Can I bring my own Architect?
Ans. You can hire any architect and structural engineer, as long as they’re officially registered with RDA/PHATA.
Q2: Can I make changes to my design after the map has been approved?
Ans. Any changes to structural elements, setbacks, or overall height need to go back through the society for approval.
Q3: Can we live on-site or use the plot temporarily during construction?
Ans. Temporary structures like a site shed for storage and a watchman’s post are allowed during construction, but these are meant for site security and material protection
Conclusion
By following all these steps in the RUDN Enclave plot construction guide, you can complete your home easily. Following the society rules and regulations, from payment of dues and approvals to lintel and finishing works, helps in completing your project in a timely and peaceful manner. With possession in all the important blocks and excellent access to the ring road, it is the perfect time to convert your plot file into a complete house.